The Reality Of Vidu AI Image To Video Workflows
Generative video remains incredibly chaotic. Everyone promises Hollywood-grade AI models. Few actually deliver. Most platforms demand ridiculous subscription fees while completely butchering your source artwork. Vidu AI steps into this mess offering a refreshingly different approach for creators.
We are evaluating a generative video ecosystem that respects base pixels. This specific vidu ai image to video workflow changes baseline expectations for budget rendering. Forget melted faces and lost textures. The vidu ai engine prioritizes aesthetic consistency above raw hallucination.
Breaking Down The AI Video Generator Landscape
Testing AI video tools usually brings intense frustration. You upload a carefully crafted character design. The AI video generator spits back a warped nightmare. The standard vidu ai image to video pipeline handles source materials differently. It locks onto the provided visual data tightly.
Art style preservation matters immensely for professional workflows. You cannot build a consistent brand if every generative video clip changes the core aesthetic. The vidu ai ecosystem guarantees your specific art style survives the rendering process intact.
Why Unified Vidu API Access Matters
Managing multiple AI platform subscriptions drains production budgets rapidly. Smart developers leverage a unified API architecture instead. Routing requests through an aggregated AI ecosystem saves massive overhead. Developers prefer API access for batch processing large vidu ai video jobs.
GPT Proto provides up to a 70% discount on these exact API calls. Accessing the vidu ai image to video endpoint via this method removes restrictive web UI limitations. You unlock flexible pay-as-you-go API pricing without enduring monthly subscription traps.
Assessing Vidu Video Generator Resolution And Motion
Quality metrics matter more than marketing hype. Vidu Q3 operates as a highly capable AI video generator. Redditors consistently note its decent output quality. The platform sits comfortably cheaper than Kling 3. Let's examine the raw hardware capabilities powering this vidu api.
Running a standard vidu ai image to video batch reveals solid baseline specifications. Creators easily hit 2K resolution targets natively. The generative video engine supports 15-second rendering durations out of the box. These numbers compete aggressively within the mid-tier AI landscape.
Hitting The 2K Generative Video Sweet Spot
Drop a specific vidu prompt like "cinematic movement" into the AI generator. The output generally matches the requested motion path perfectly. This ai video generator understands basic camera physics. Panning, tracking, and zooming operations behave predictably through the vidu api.
Maintaining 2K resolution across a full 15-second clip requires massive AI compute power. Budget AI models usually degrade image quality halfway through the render. The vidu ai image to video architecture sustains pixel clarity from frame one until the final second.
Robotic Arms And AI Video Quirks
But there's a catch. Motion consistency remains a mixed bag. Several testers document glaring issues with robotic arm movements specifically. Limbs occasionally rotate at physically impossible angles. The ai video physics engine struggles with complex mechanical joints.
Surprisingly, the integrated AI sound generation operates flawlessly. Audio tracks align perfectly with the generated video events. If physical rendering artifacts ruin your workflow, test the Vidu Q3 Turbo generative video endpoints for upgraded physics calculations and better AI stability.
Prompt Adherence In Vidu AI Image To Video Tools
Writing instructions for an AI video generator requires strict syntax discipline. Vague concepts fail immediately. The vidu ai image to video engine expects rigid, mathematical instructions. Mastering vidu prompt adherence separates professional creators from frustrated amateurs.
Standard web interfaces frequently enforce aggressive input character limits. This restriction blocks complex scene descriptions. Hitting a text wall while building a detailed vidu prompt kills creative momentum instantly. Professional workflows require expansive text inputs.
Advanced Vidu Prompt Execution Methods
Want pristine results? Demand absolute specificity. Vidu ai supports direct image file referencing natively. Using the @ symbol locks down specific chronological frames. Formatting matters immensely when addressing the generative video engine.
"You can be explicit and reference using @, like @Image1, @Image2... try to be more explicit 'Start with @Image1, end with @Image3'."
This exact vidu prompt syntax forces the AI video generator to respect keyframes. It isn't a flawless guarantee, but it dramatically improves AI clip consistency across multiple renders.
Bypassing UI Limits With Vidu AI API
Web UI character limits vanish when operating through the vidu api directly. Raw API payloads bypass basic consumer restrictions entirely. When you read the full API documentation, the true capacity of the ai video generator becomes obvious.
GPT Proto handles unified API routing instantly for these heavier payloads. Sending complex vidu ai image to video API requests allows massive prompt strings. Your AI models execute exactly what you write, without arbitrary text truncation ruining the generative video scene.
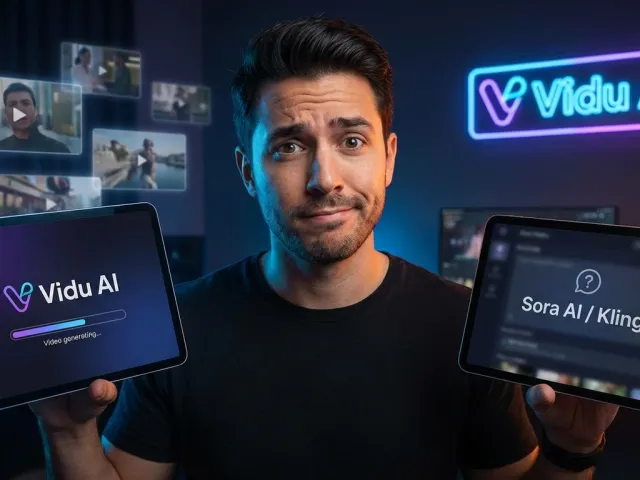
Vidu AI Vs Kling Alternative Competitors
Comparing various AI models reveals the true generative video market hierarchy. Sora AI dominates media headlines globally. Kling leads public accessibility. Where exactly does the vidu ai image to video platform sit within this aggressive AI ecosystem?
Every ai video generator carries unique rendering signatures. Identifying the correct Kling alternative determines your project's success. Let's break down the head-to-head performance metrics across the top AI video contenders.
The Heavyweights In Generative Video API Access
Sora AI produces undeniably stunning visuals. It also remains firmly locked behind closed doors. Grok generates dynamic video but frequently ignores original art styles. Vidu ai dominates this specific niche. It maintains exact source textures flawlessly.
Seeing carefully designed characters morph into generic AI faces frustrates animators endlessly. The core vidu ai image to video technology prevents this melting effect. Original illustration styles survive the AI rendering pipeline completely untouched.
Stacking AI Video Generator Pipelines
Kling 3.0 remains the safest Kling alternative for general generative video tasks. It handles environmental physics smoothly. However, Seedance 2.0 frequently wins API benchmarks regarding realistic human movement. Veo 3.1 looks visually impressive but features terrible prompt adherence.
- Vidu AI Video: Best for budget constraints and strict art style preservation.
- Kling 3.0: Optimal for general physics and stable API environments.
- Seedance 2.0: Superior AI modeling for realistic human limb movement.
- Veo 3.1: High-end visual fidelity requiring extreme prompt engineering patience.
Savvy creators rarely depend entirely upon a single AI video generator. They build composite ai video workflows. They pull individual AI clips from Runway, Kling, Pika, and Luma Dream Machine. You can browse Vidu and other models via unified API endpoints to orchestrate these complex multi-tool pipelines.
Managing API Costs For Vidu AI Image To Video Generation
Financial constraints dictate most production workflows. Running continuous vidu ai image to video batches gets expensive rapidly. Analyzing the real economic numbers behind these AI platforms prevents massive budget overruns. Generative video API calls require precise tracking.
Many standalone AI video sites operate strictly as subscription traps. They charge exorbitant monthly flat fees. Even their highest premium tiers enforce severely limited AI generation credits. This restrictive economic model hurts independent developers.
Avoiding Scam AI Video Subscriptions
Most commercial AI sites rip off users directly. BudgetPixel AI offers cheap testing grounds, but you quickly hit a harsh quality wall. Vidu Q3 stands out as a genuinely affordable vidu generator. It delivers measurable ROI exceeding raw Kling 3 credit systems.
Evaluating the vidu ai image to video api costs reveals a developer-friendly structure. The pricing scales logically based on actual rendering seconds. Paying strictly for successful ai video generator outputs keeps project finances highly predictable.
Scaling An Affordable Vidu Generator Pipeline
The smartest financial strategy involves unified API routing architecture. Ditch individual AI platform subscriptions completely. Use GPT Proto to manage your AI video tokens. The platform aggregates multiple generative video models into one unified API endpoint.
Review the vidu ai image to video Q2 Pro pricing via the GPT Proto platform. The API approach delivers massive savings automatically. It guarantees intelligent AI scheduling and provides fallback API endpoints if one specific AI video generator experiences downtime. Check your flexible pay-as-you-go pricing dashboard to monitor these API savings.
Practical Use Cases For The Vidu AI Video Workflow
Deploying a vidu ai image to video workflow makes sense for specific production needs. Understanding where this generative video API excels prevents wasted rendering time. Let's examine real-world applications benefiting from this exact AI video generator.
Deploying AI Video For Social Content
Social media marketers need rapid, affordable video creation. The 15-second vidu ai video duration fits TikTok and Instagram Reels perfectly. Generating consistent brand mascots across multiple clips requires strict art style preservation. The vidu api handles this exact requirement flawlessly.
Combining the vidu video generator with CapCut or Premiere allows endless content scaling. Creators generate the core AI clips using precise vidu prompt adherence, then stitch the narrative together externally. This workflow maximizes limited AI API budgets.
Rapid Storyboarding With Vidu Prompt Control
Film directors and agency creatives utilize the vidu ai image to video pipeline for rapid storyboarding. Visualizing a scene with the @Image1 to @Image3 syntax provides immediate client feedback. The affordable vidu generator costs allow dozens of iteration cycles.
| Generative Video Endpoint |
API Cost Profile |
Art Style Preservation |
Motion Consistency |
| Vidu AI Image To Video |
Highly Affordable API |
Excellent Matching |
Mixed (Robotic Joints) |
| Kling 3.0 API |
Mid-Tier API |
Good Matching |
Highly Consistent |
| Veo 3.1 Endpoint |
Premium API |
Variable Matching |
Struggles With Prompts |
| Seedance 2.0 API |
Mid-Tier API |
Good Matching |
Realistic Human Motion |
Final Verdict On Vidu AI Video Generation
We covered the inherent AI limitations thoroughly. The robotic arm anomalies definitely need engineering work. Web UI character limits block extreme vidu prompt strategies. Yet, the vidu ai image to video ecosystem remains a powerhouse contender for budget-conscious creators.
The platform delivers exactly what it promises: affordable, style-accurate generative video. The AI sound generation surprises everyone with its clarity. Resolving the character limit issue simply requires shifting your workflow toward direct vidu api integration.
Who Needs This Specific Vidu Video Generator
Operating on a strict budget makes this AI video generator highly attractive. Preserving original artwork beautifully sets it apart from Grok and Sora AI. The 2K resolution ceiling handles standard commercial AI demands easily. Unified API integration ensures future scalability.
If you build marketing assets, run social media channels, or prototype game animations, this vidu ai video tool deserves testing. It operates as a highly reliable Kling alternative when source image fidelity matters most.
Next Steps For Vidu AI Image To Video Projects
Stop relying entirely on locked web UI platforms. Move your generative video production into an API-first environment. Combining the vidu ai image to video endpoint with a unified API aggregator changes production speed permanently. The multi-model approach wins every time.
Smart developers test multiple AI models simultaneously. Learn more on the GPT Proto tech blog about optimizing these exact AI API calls. Master the vidu prompt syntax, respect the motion limitations, and execute your generative video ideas efficiently.
Written by: GPT Proto
"Unlock the world's leading AI models with GPT Proto's unified API platform."